|
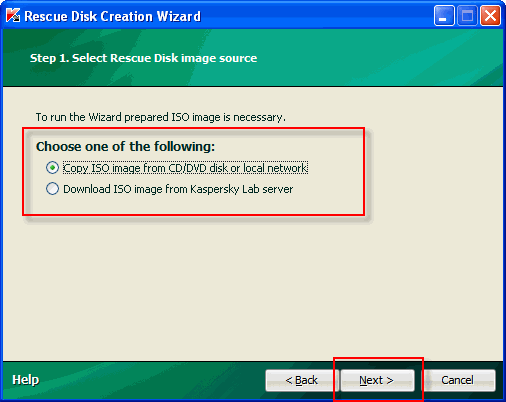
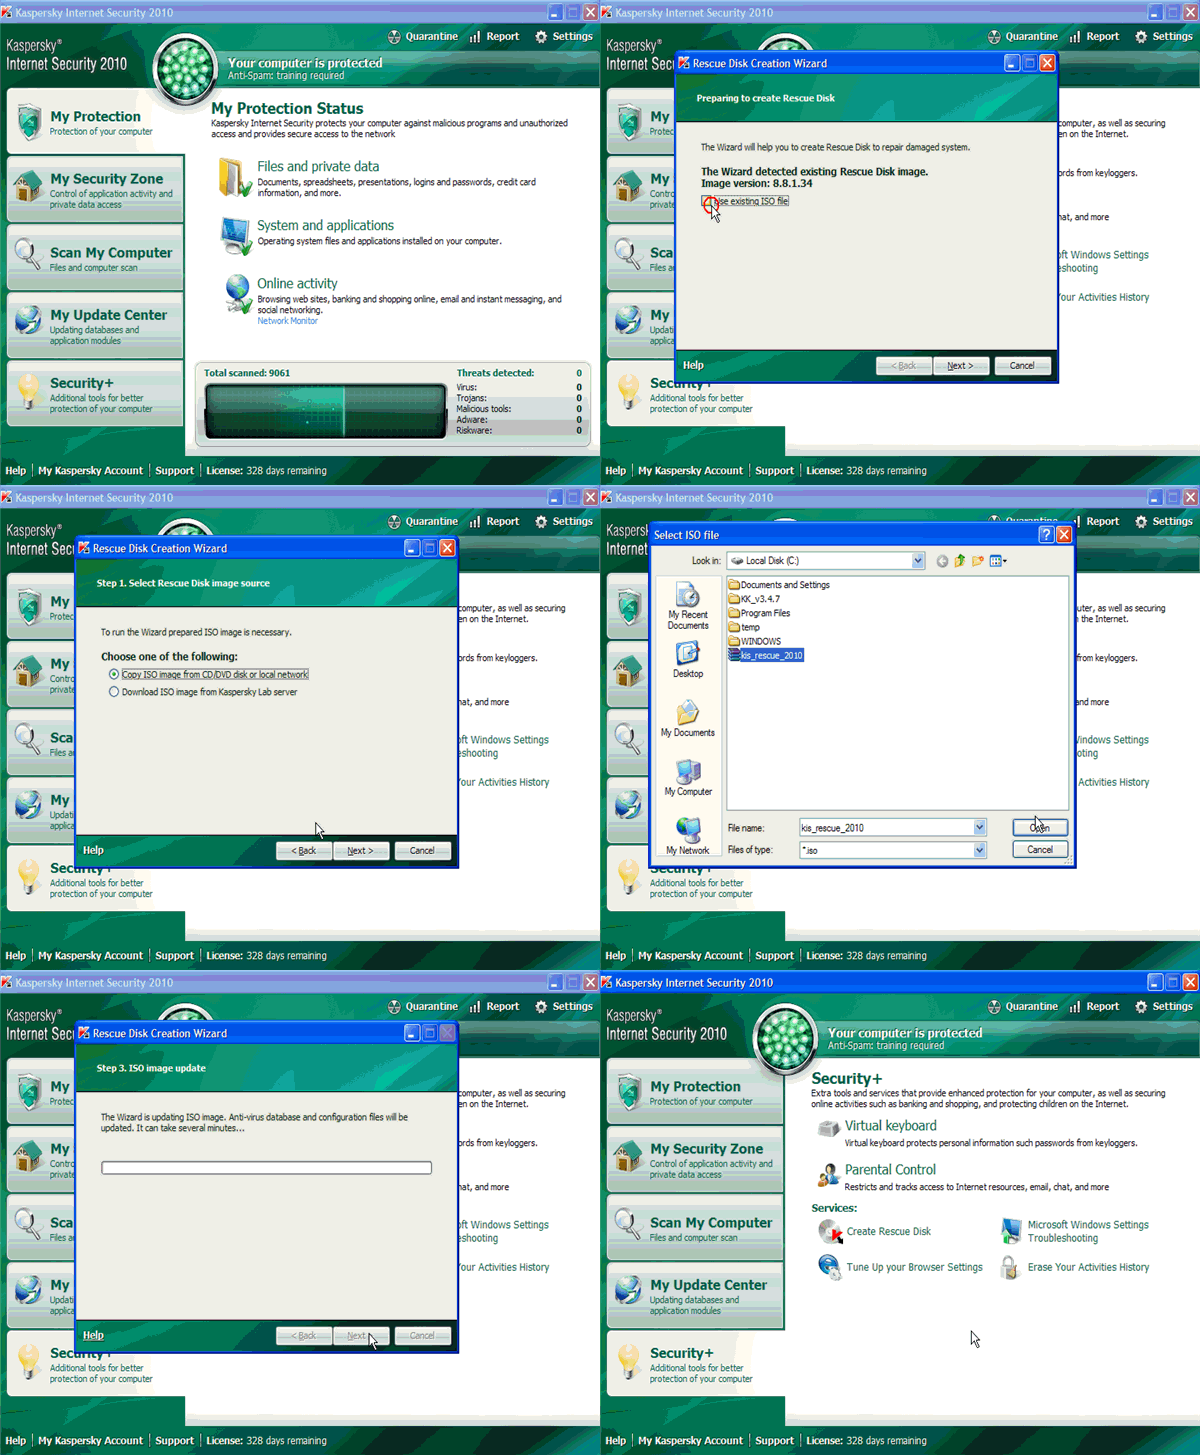
This Howto articles Concerning Kaspersky Internet Security 2010. A special service which helps to create a rescue disk to repair the damaged system has been added to Kaspersky Lab 2010 products. The disk may come in handy when system files are damaged after a virus attack and/or in case of the OS failure. In this case Rescue Disk can help you load your PC and recover the system to its initial state before it has been damaged. A rescue disk is an iso image based of the Linux OS kernel. The image includes: Linux system and configuration files; Set of tools to diagnose the OS; Set of additional tools (file manager and etc); Files of Kaspersky Rescue Disk; Files with the anti-virus databases. Rescue disk creation means the creation of a disk image (ISO file) with up-to-date anti-virus databases and configuration files. The source disk image serving as base for new file creation can be downloaded from Kaspersky Lab server or copied from a local source. To create a rescue disk, do the following: open the main application window select Security+ in the right part of the window click the button Create Rescue Disk in the RD Creation Wizard window click Next on Step 1 select Rescue Disk image source - Copy ISO image from CD/DVD disk or local network - if you have the Rescue Disk on your computer or you have an ability to download it from local network
- Download ISO image from Kaspersky Lab server - if you choose this variant, then the Rescue Disk image is downloaded from the Kaspersky Lab server only if you are connected to the Internet. The latest version of rescue disk is downloaded from the Kaspersky Lab server.
 If the wizard has detected an image file created earlier in the folder: - "Documents and Settings\All Users\Application Data\Kaspersky Lab\AVP9\Data\Rdisk\" (for Windows XP)
- "ProgramData\Kaspersky Lab\AVP9\Data\Rdisk\" (for Windows Vista),
you can use it as original disk image by checking the Use existing ISO file box, and jump to Step 3 - image update. If the wizard has not detected any image file, this box is not available.  On Step 2 the Wizard copies/downloads the ISO image. Browse the path to the file with an iso extension and click Next On Step 3 the Wizard updates the anti-virus databases and configuration files. To launch the update process, click Next. once the update process is over, the Wizard saves rthe ISO image in the folder On Step 2 the Wizard copies/downloads the ISO image. Browse the path to the file with an iso extension and click Next On Step 3 the Wizard updates the anti-virus databases and configuration files. To launch the update process, click Next. once the update process is over, the Wizard saves rthe ISO image in the folder - "Documents and Settings\All Users\Application Data\Kaspersky Lab\AVP9\Data\Rdisk\" (for Windows XP)
- "ProgramData\Kaspersky Lab\AVP9\Data\Rdisk\" (for Windows Vista).
close the Browser window and finish work of the Wizard by clicking Finish  With the help of the file received as a result of the wizard's work create a bootable CD/DVD-disk (for this use any program to burn CD/DVD-disk, e.g. Nero). |